Absolute beginner iOS tutorial: Age Calculator app in Swift
In this Step-by-Step tutorial we will create a simple age calculator application.
The user select his birth date from a date picker then he press a button,we then calculate his current age in years, months and days
Finally we display it in a UILabel.
What we will learn
How to calculate difference between two Date objects
How to use Calendar to get Date Components
How to use UIDatePicker
How to add Auto layout constraints to simple view
How to create and display a UIAlertController
Start a new Xcode project
1- Lets start by opening Xcode->Create a new Xcode project->Single View App->Next
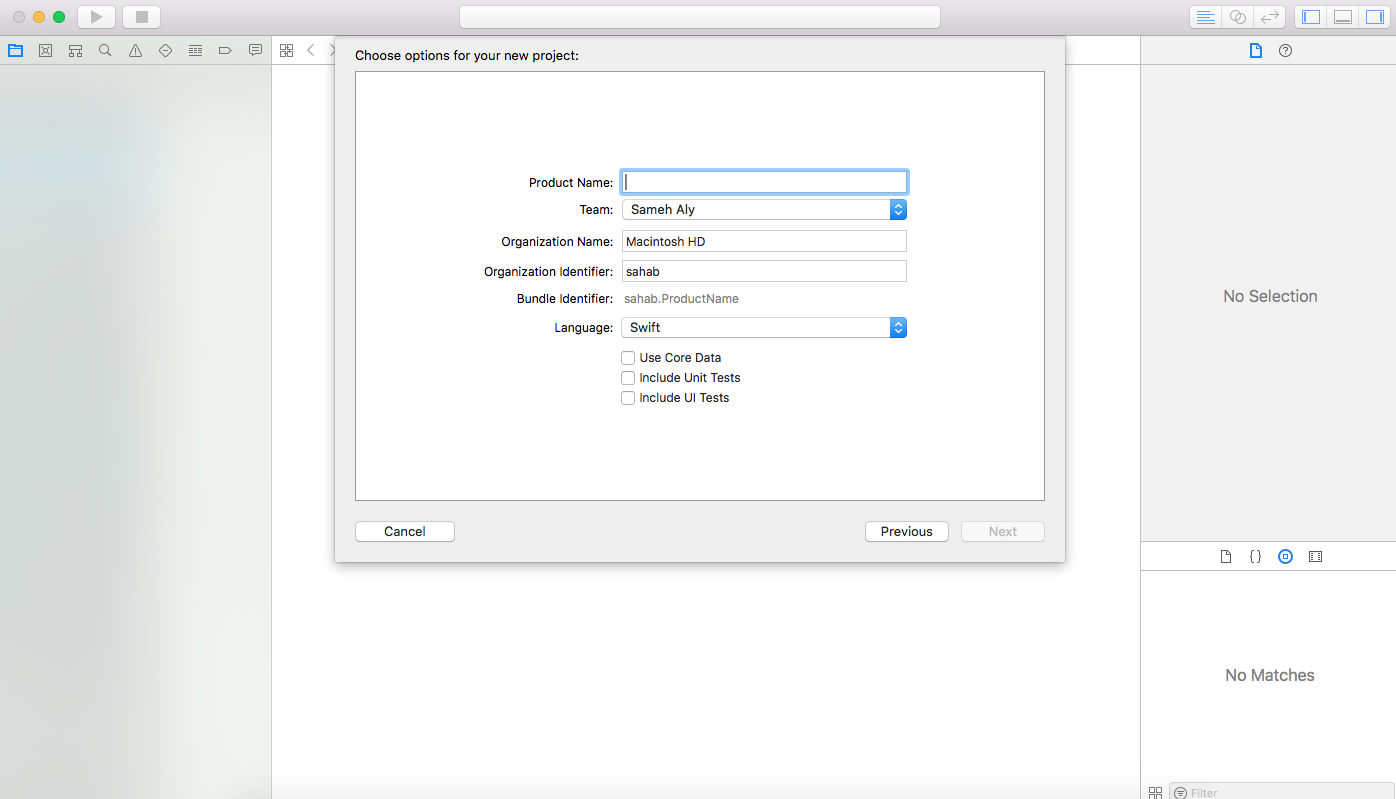
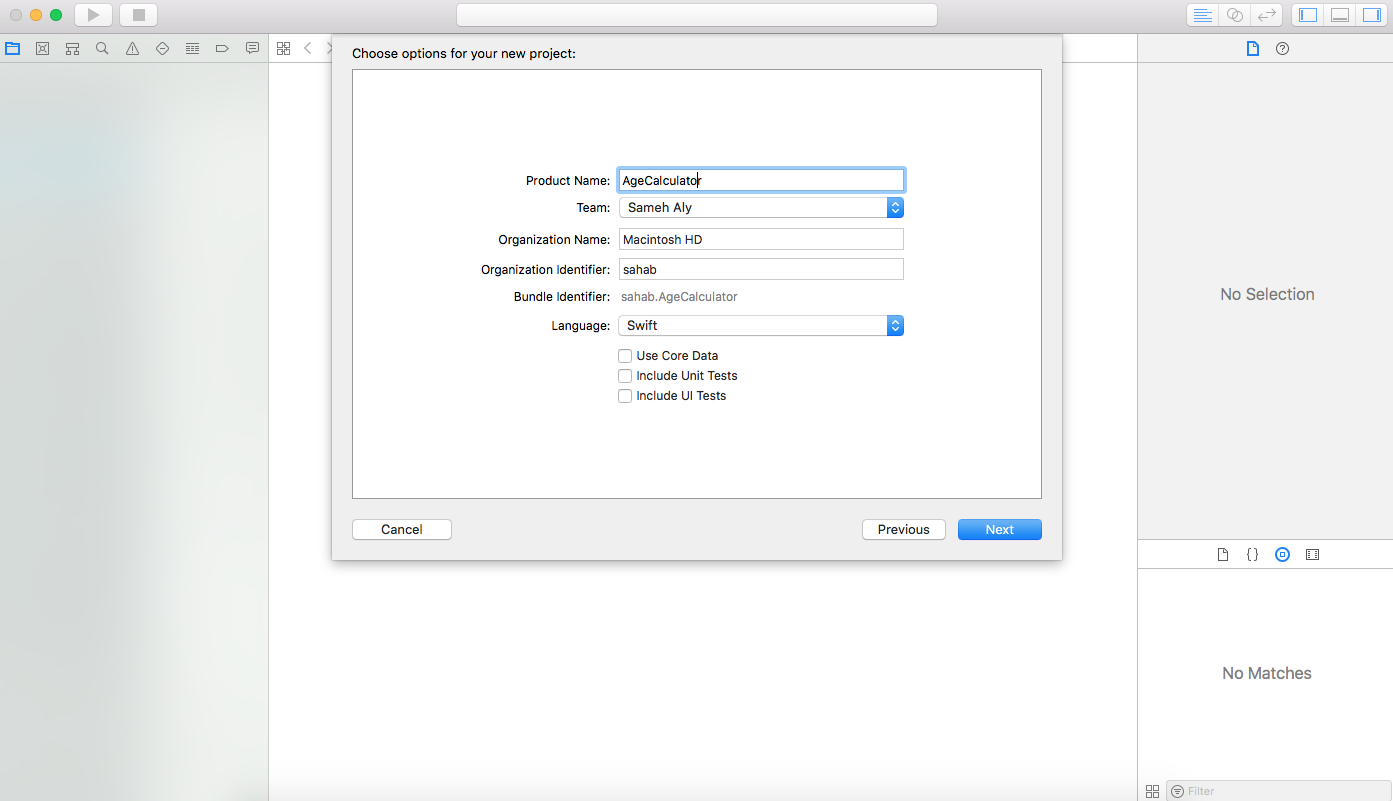
2- Ensure that the selected Language is Swift and in “Project Name” enter “AgeCalculator” and select a Team and press Next
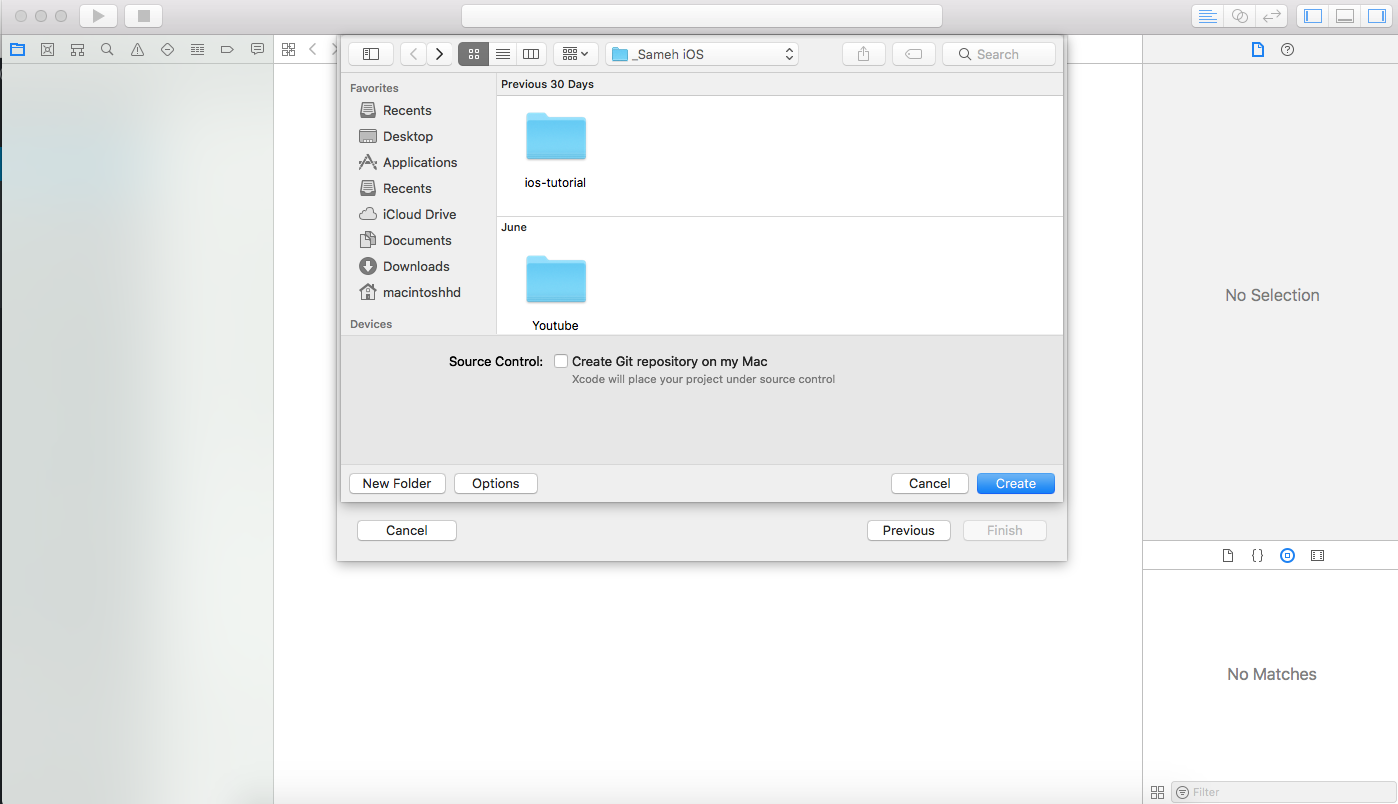
3- Select a location for your project and press Create
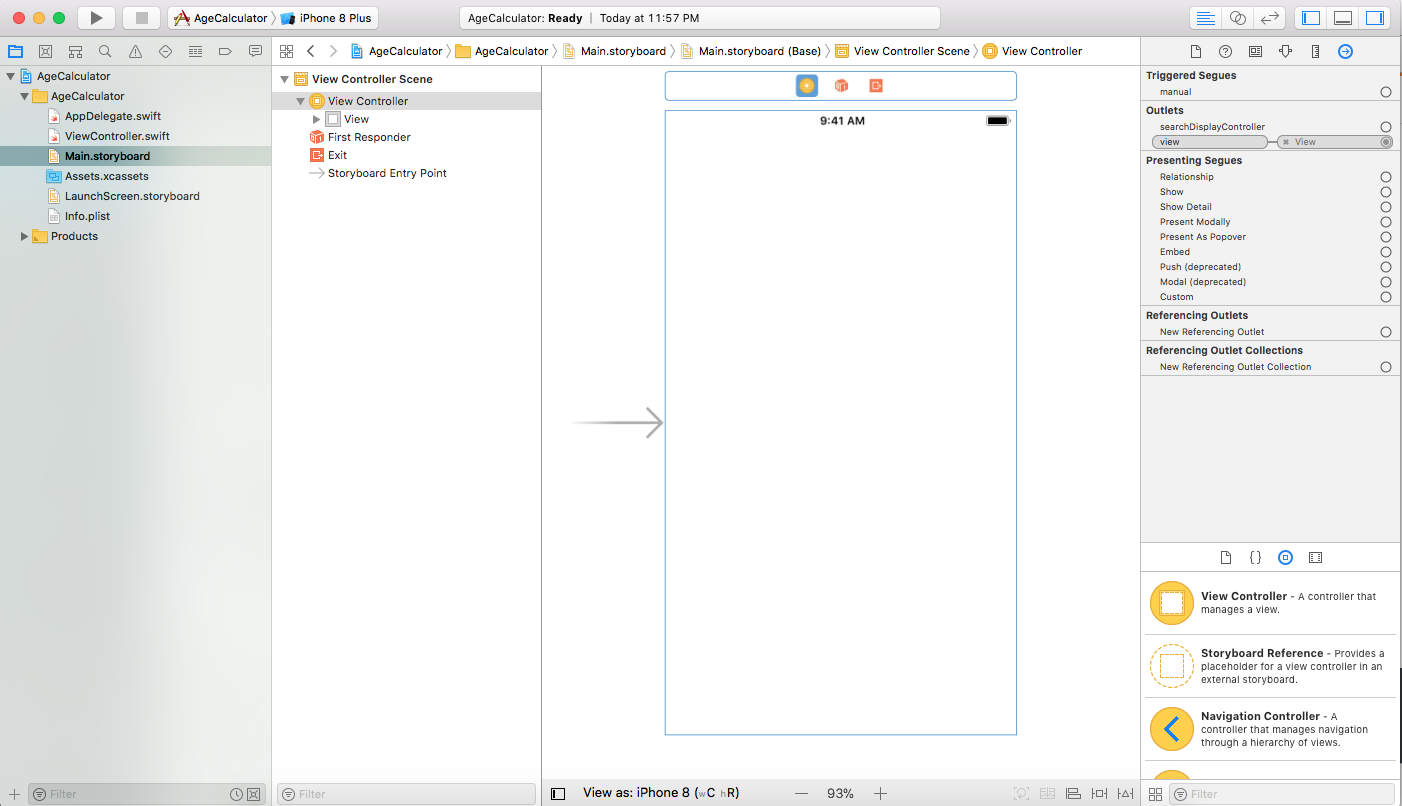
4- Xcode automatically creates Main.storyboard and ViewController.swift for you, we will use them, no need to create other view controllers because our application will contain only one screen.
Setup application user interface in storyboard
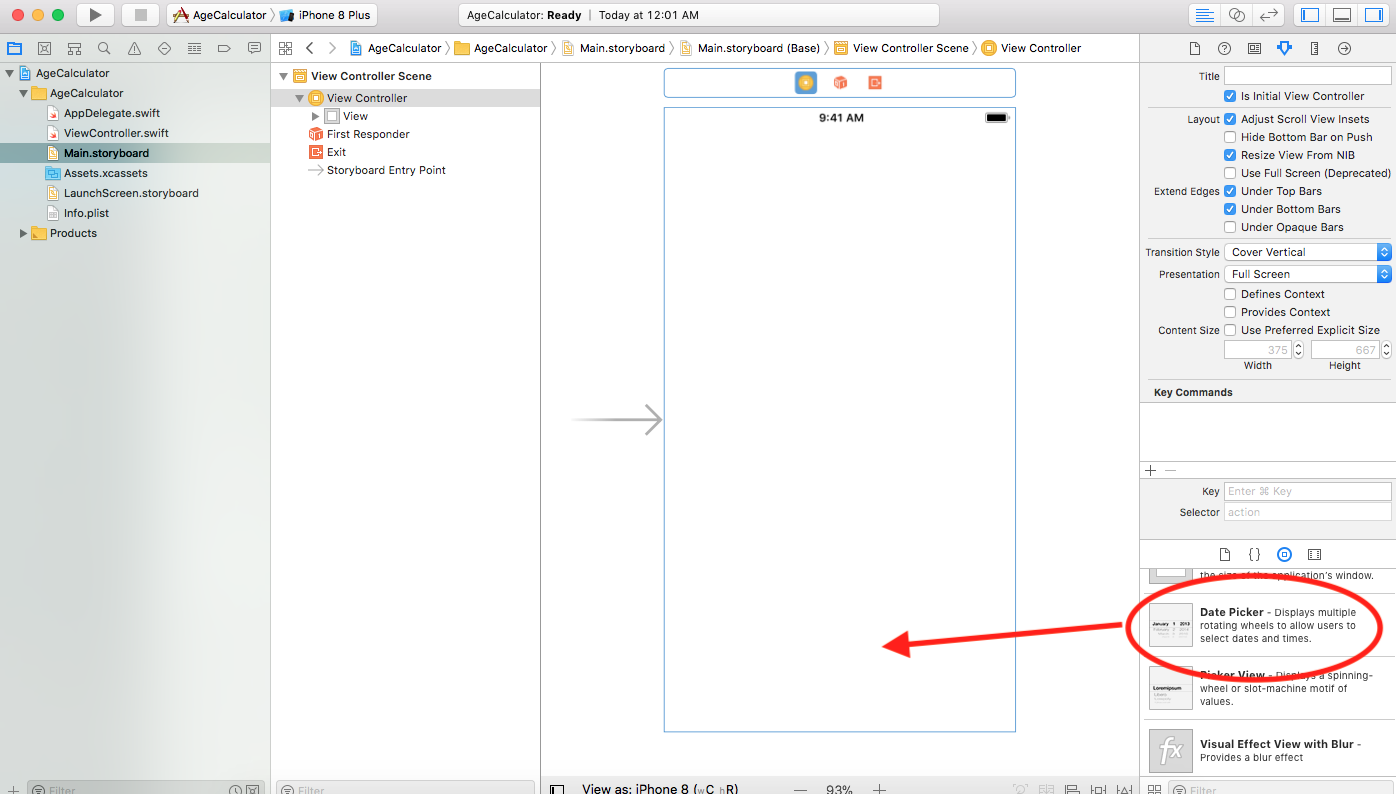
5- Open Main.storyboard
6- From the Object Library on the right side locate “Date Picker” and drag it to the ViewController view
7- Align the Date Picker to the bottom of the view and center it horizontally
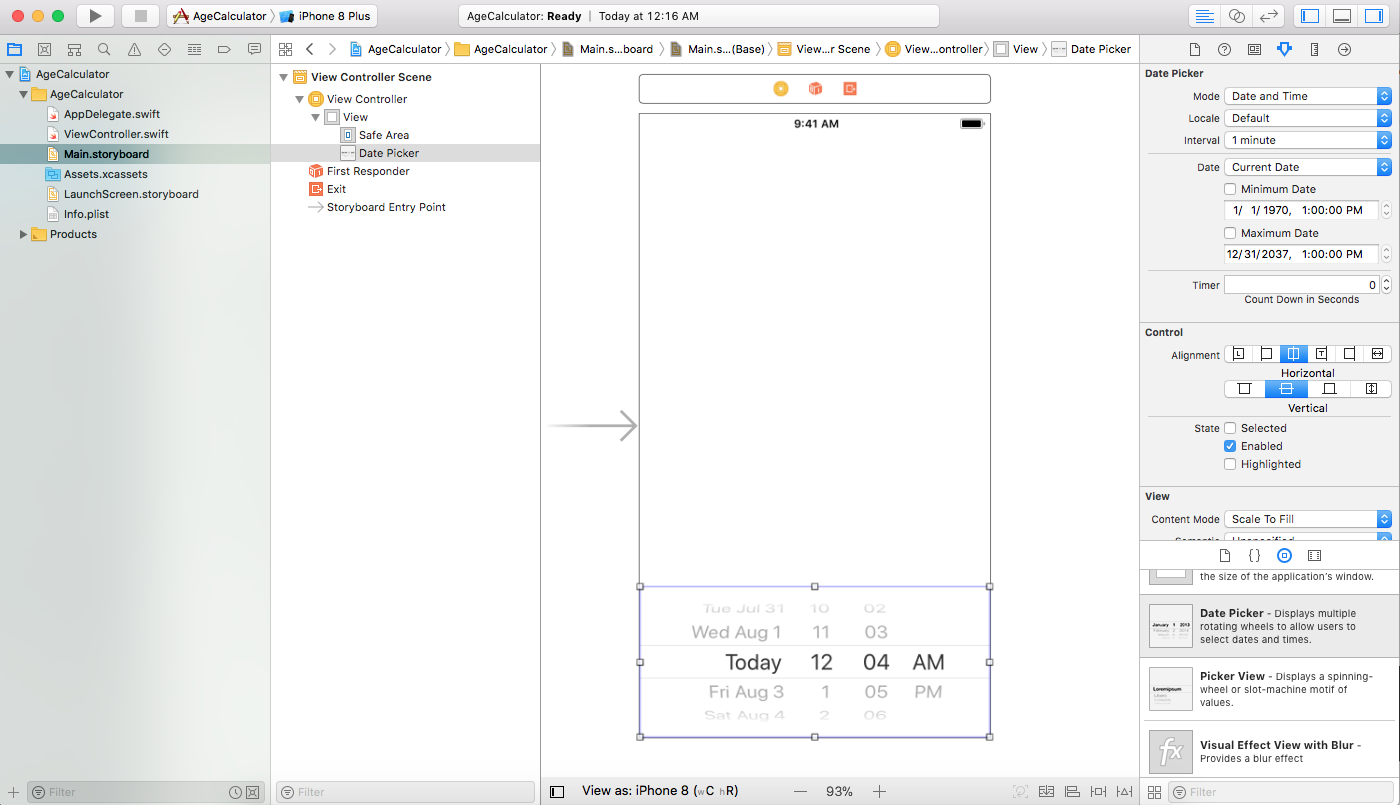
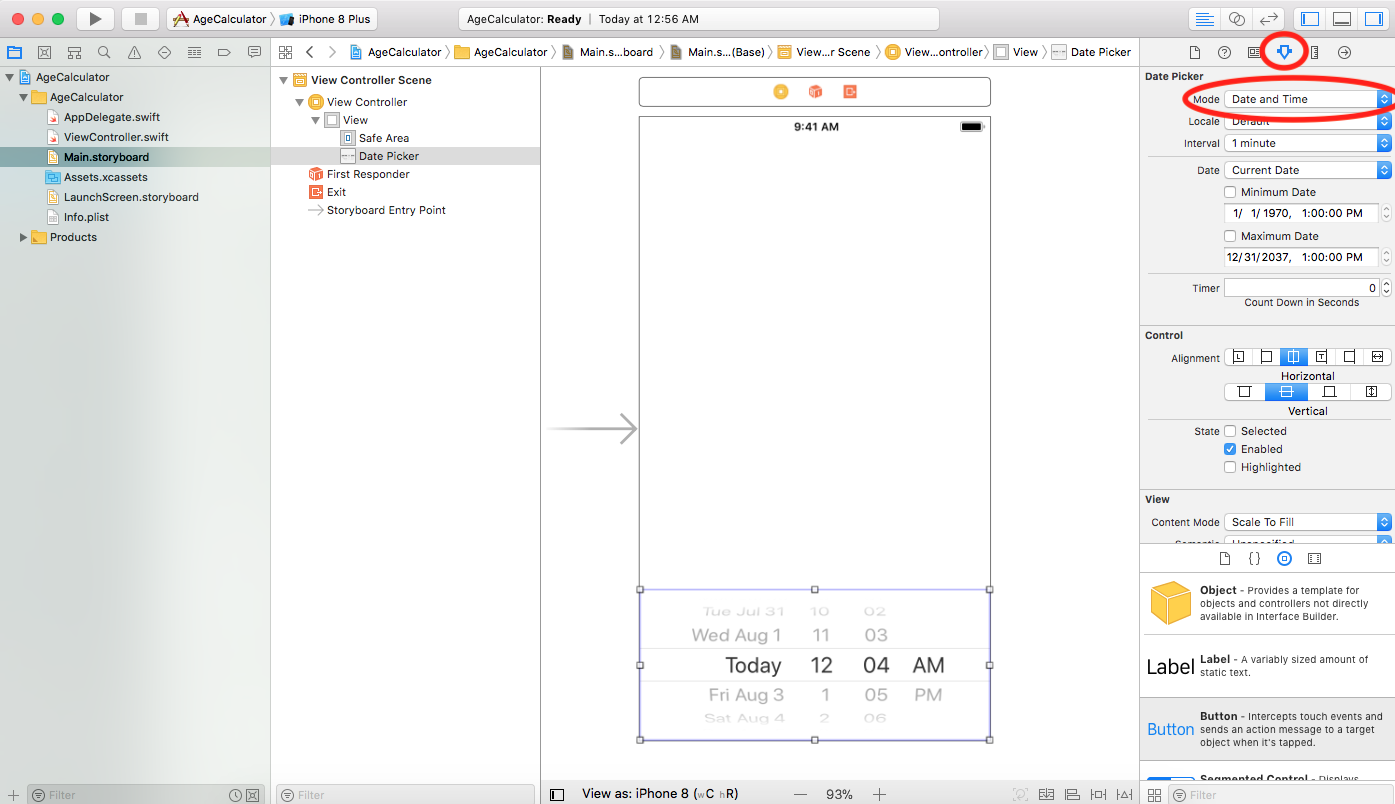
8- Did you notice that the Date Picker shows date and time by default, we want it to show only date so select our Date Picker->select attributes inspector on the right side->then change “Mode” to “Date”
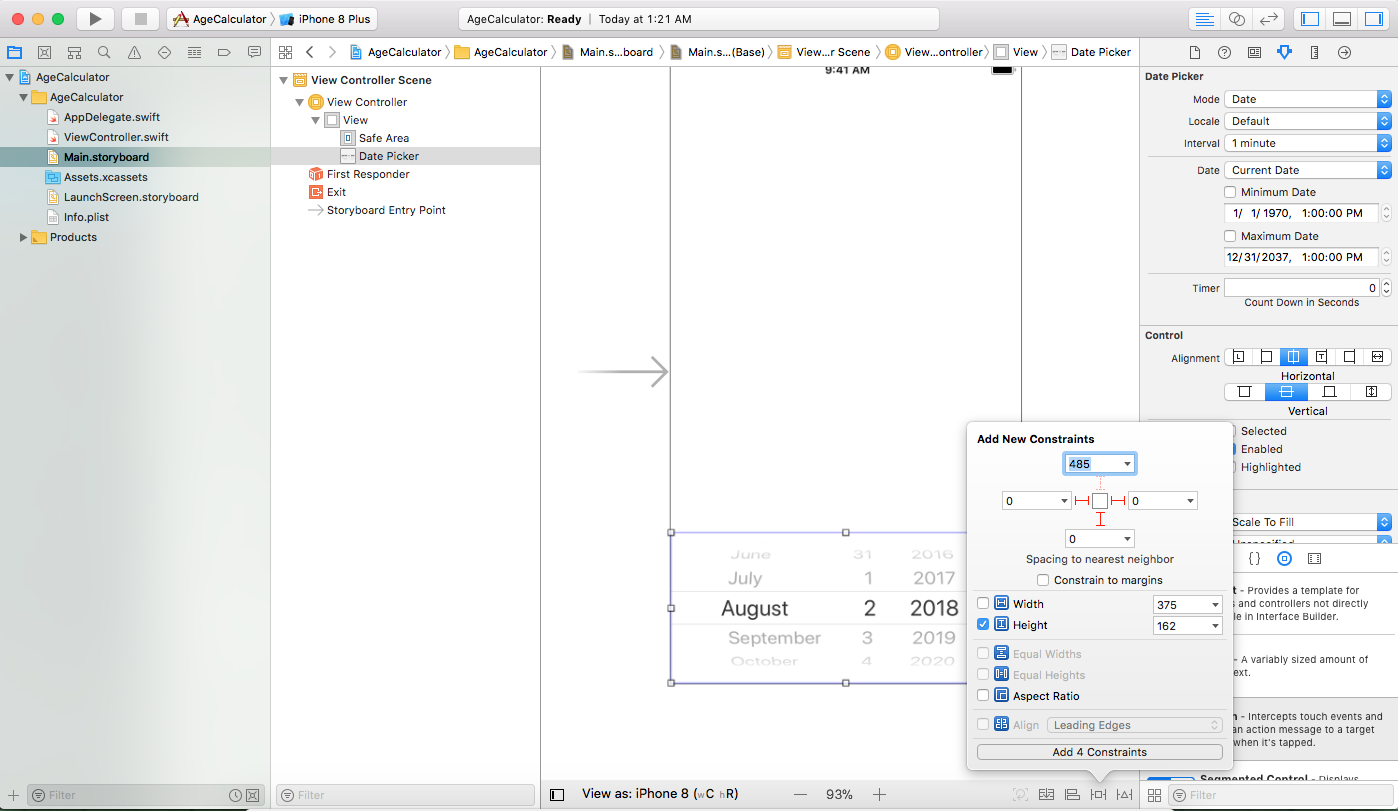
9- Now its time to add some constraints to our Date Picker so that it is always pinned to the bottom of our screen, we will also give it a fixed height and zero margins from left and right so that it always occupy the full width of the view.
Ensure that the Date Picker is selected and then press on the “Add New Constraints ” button.
From the popup window add the following constraints
Leading = 0, Trailing = 0 , Bottom = 0 and Height = 162
and Ensure that “Constrain to margins” is not checked
Your Add New Constraints window should look like this
10- Now press Add Constraints
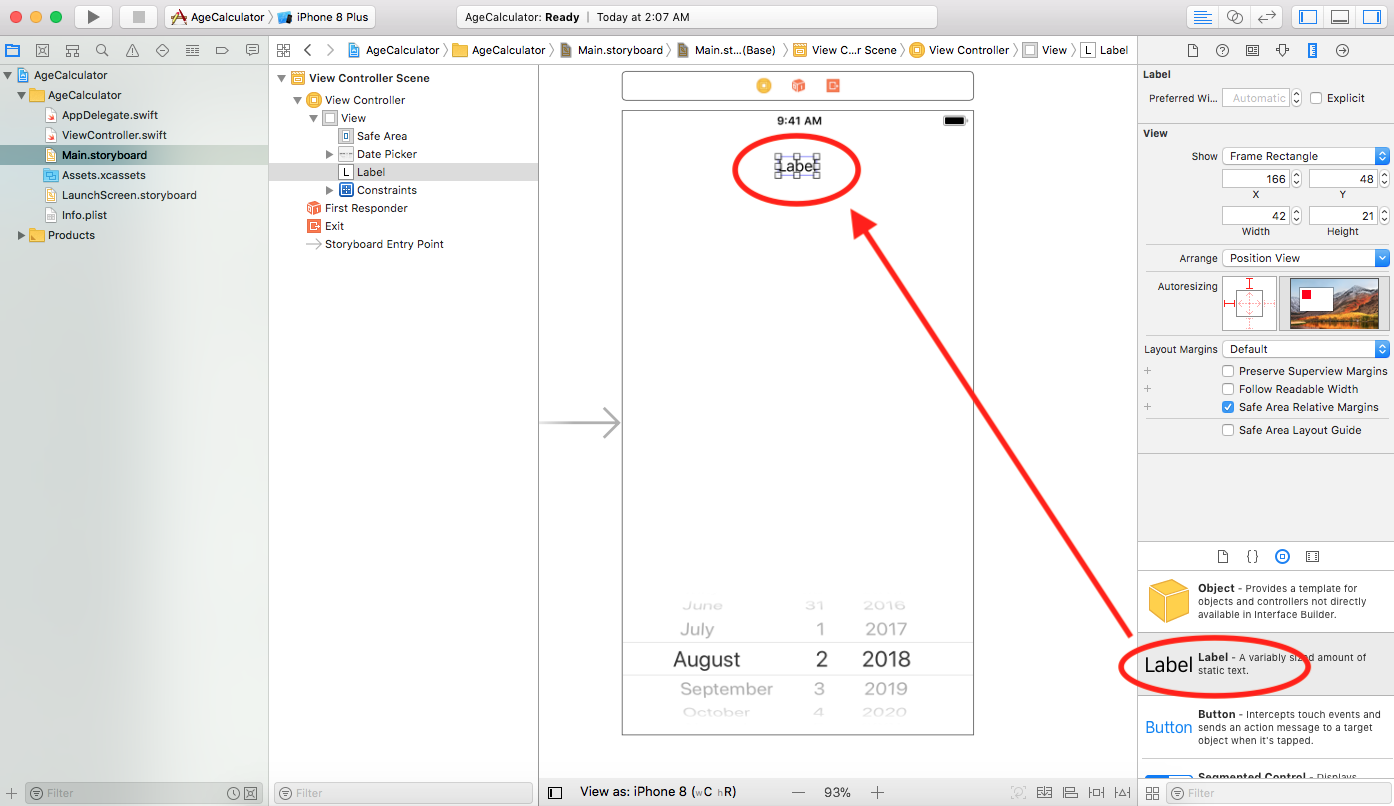
11- Now lets add UILabel to the top of our view to display results.
Locate UILabel in Object Library and drag it to our View
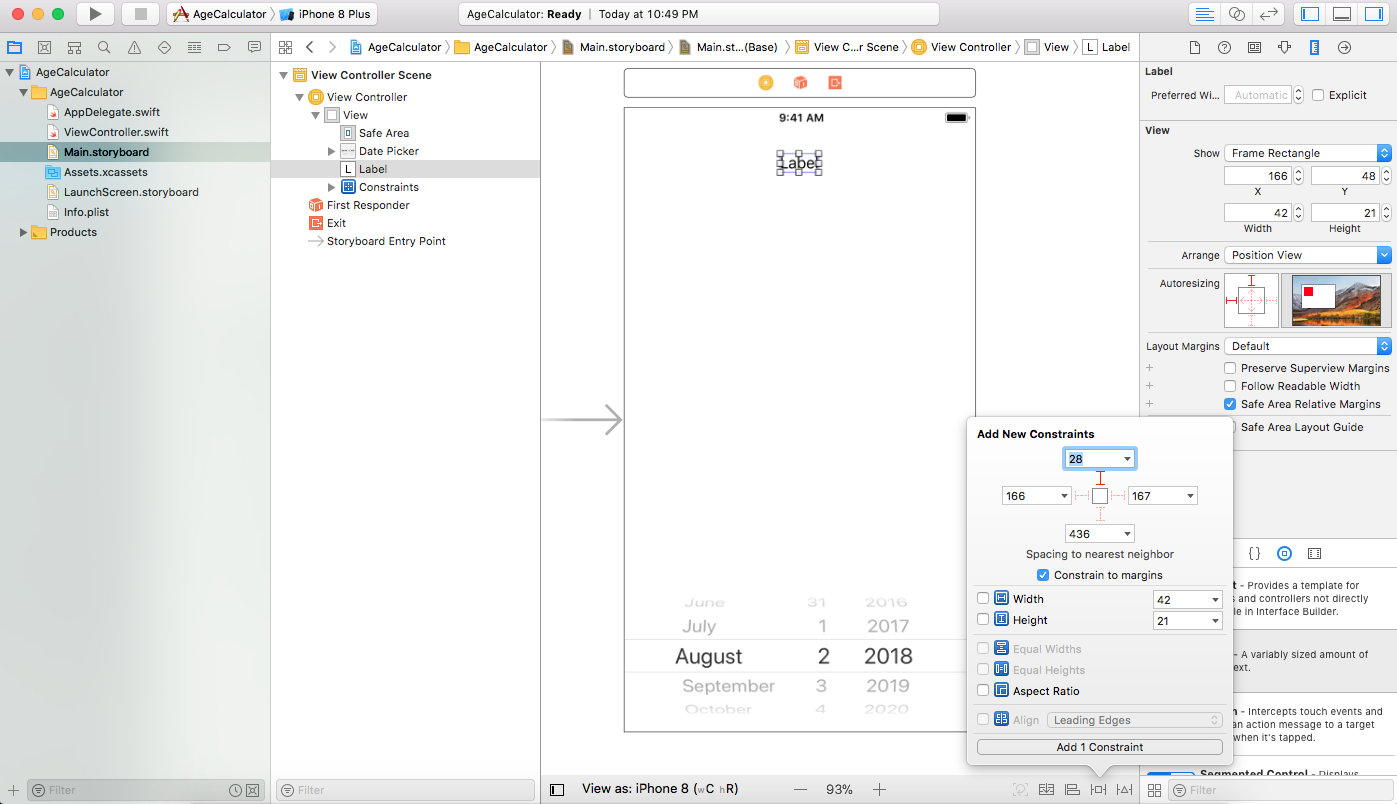
12- Again ensure that the label is selected and press “Add New Constraints” but this time we will add top constraint only, let it be 28
13- With the label still selected press “Add New Alignment Constraints” and select “Horizontally in container” and press “Add Constraints”
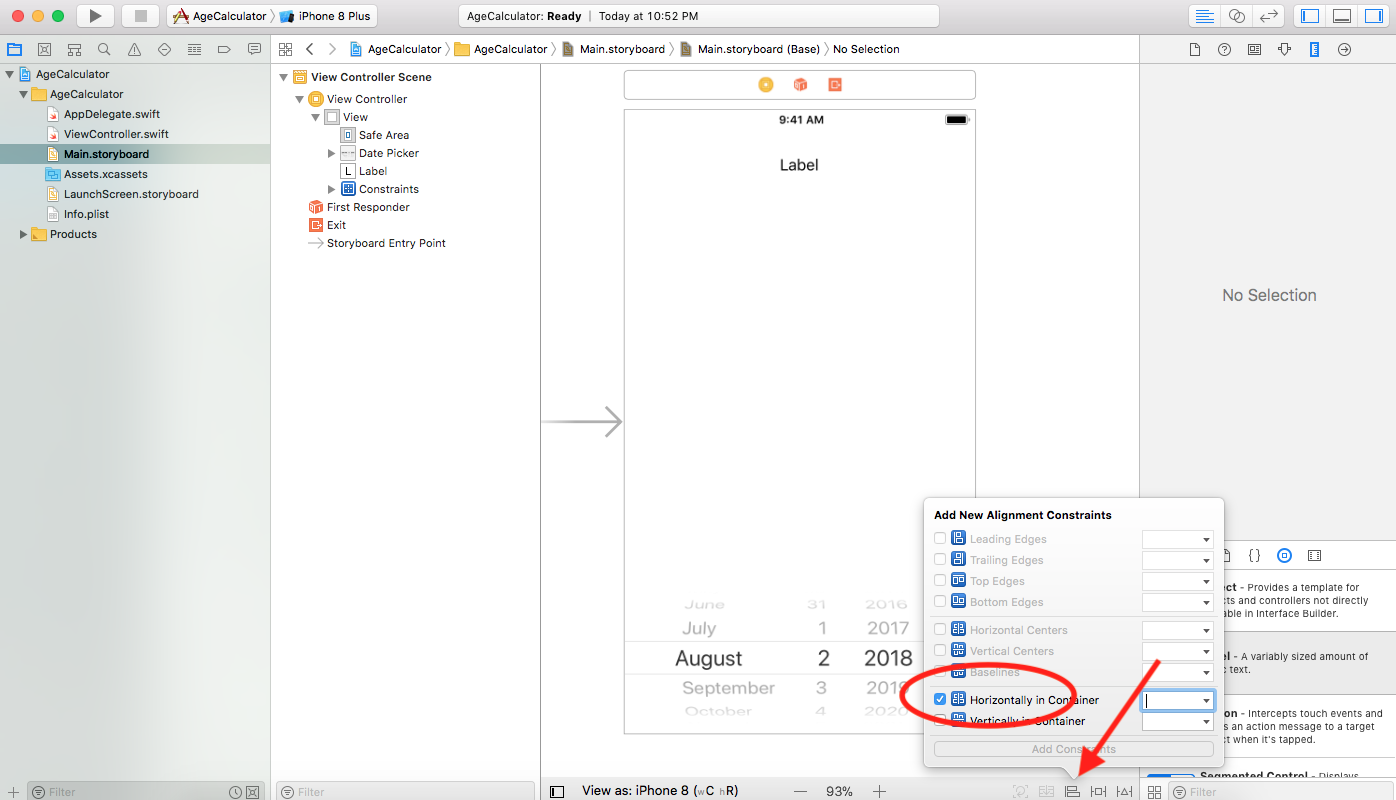
We will not add any constraints to the label width, leading or trailing because by default the label will expand to display its entire content in one line
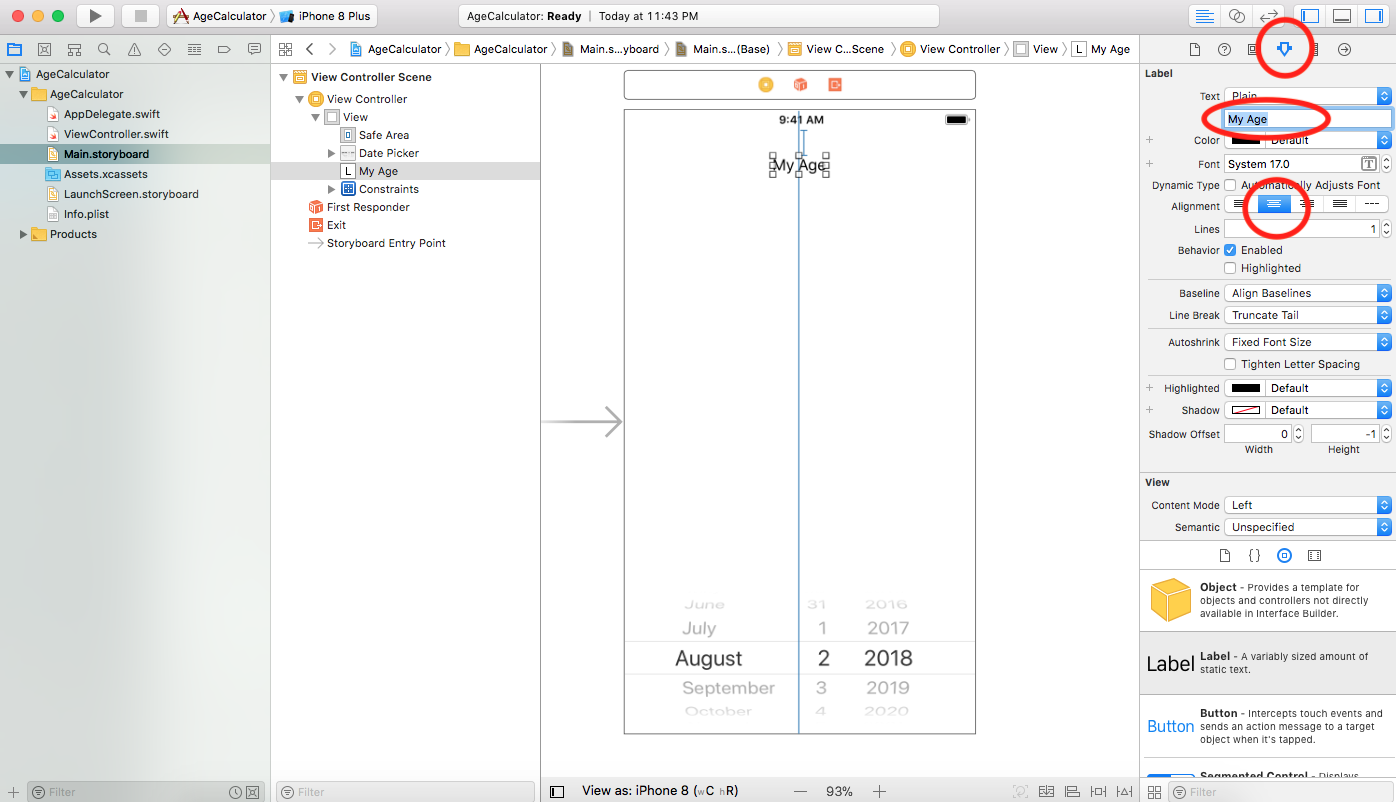
14- With the label still selected go to its Attributes Inspector and set the Alignment to center and the text to “My Age”
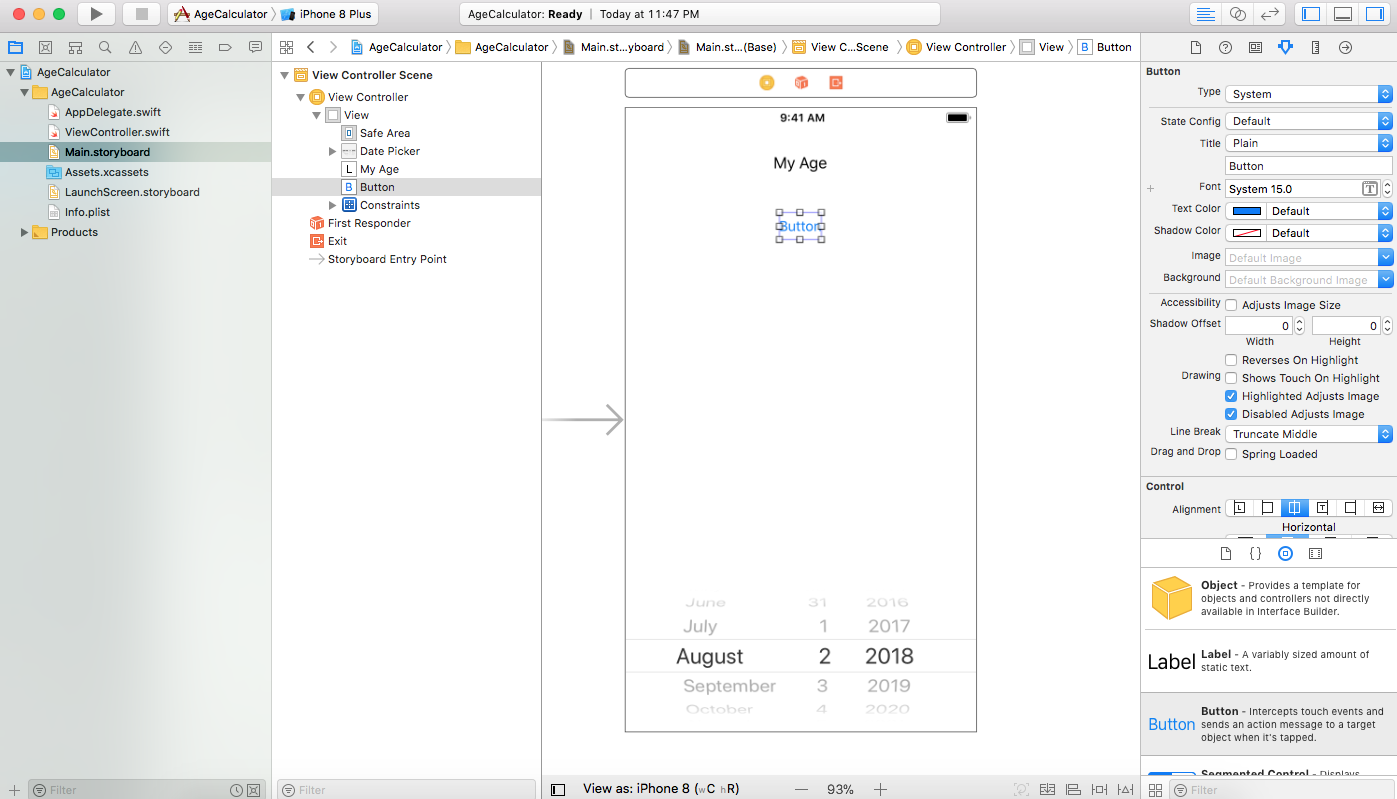
15- In Object Library locate Button and drag it to your view under your label
16- Add Top and Center Horizontally in container constraints to the button, if you don’t know how refer to step 12 and 13, your layout should look something like this

Note that this time when you added a Top constraint to the button, Xcode added the constraint from the button to its nearest neighbor from top which is the label.
You can change that but in our tutorial this is exactly what we need
17- With the button still selected go to its attributes inspector and change its title to “Calculate my age” and notice how the button expanded to display the whole title.
IBOutlet and IBAction
Once we finish setting up our controls and auto layout constraints we are now ready to write some code.
But first we must establish a connection between our interface controls and our code.
For example how can we read the value of the selected date in Date Picker in our code? how can we set the text value in our label ? how can we tell the button to execute code when it is touched?
IBOutlet and IBAction are macros that define that a property or a method can be referred to in Interface Builder or storyboard.
You use an IBOutlet to connect a property in your code to an object in your storyboard like a UIButton or UILabel so that you can access its properties (title, background color, …) from code.
IBAction is a special method that is being triggered by an object in storyboard like a UIButton.
Let see how it works in our example
18- Open ViewController.swift and add these lines just before the viewDidLoad function
    @IBOutlet weak var lblAge: UILabel!
    @IBOutlet weak var datePicker: UIDatePicker!
We define two IBOutlets, one for our label and the other for the Date Picker.
We did not define an IBOutlet to our button because we will need to access any of its properties from code, instead we will need it to trigger an action.
So we will create an IBAction method for the button in the next step
19- Write the following function just before the ending } of our class
    @IBAction func btnCalculateHandler (_ sender: UIButton)
    {

    }
Note that it is just a function with the keyword @IBAction before it, very easy.
Your ViewController now should look like this
import UIKit

class ViewController: UIViewController {

    @IBOutlet weak var lblAge: UILabel!
    @IBOutlet weak var datePicker: UIDatePicker!

    override func viewDidLoad() {
        super.viewDidLoad()

    }

    override func didReceiveMemoryWarning() {
        super.didReceiveMemoryWarning()

    }


    @IBAction func btnCalculateHandler (_ sender: UIButton)
    {

    }
}
20-Now lets link them to our controls by opening the Main.storyboard
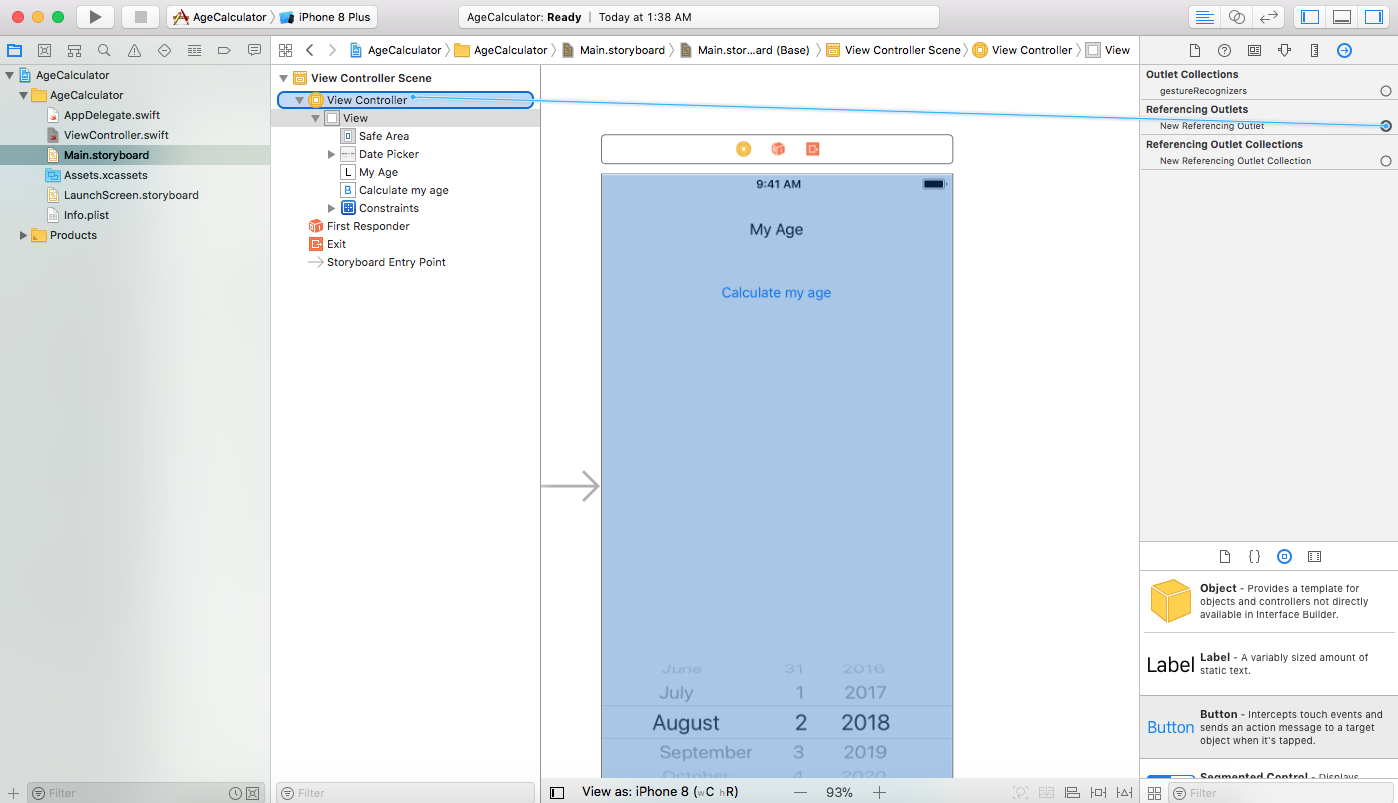
21- Select the label and open its Connections Inspector
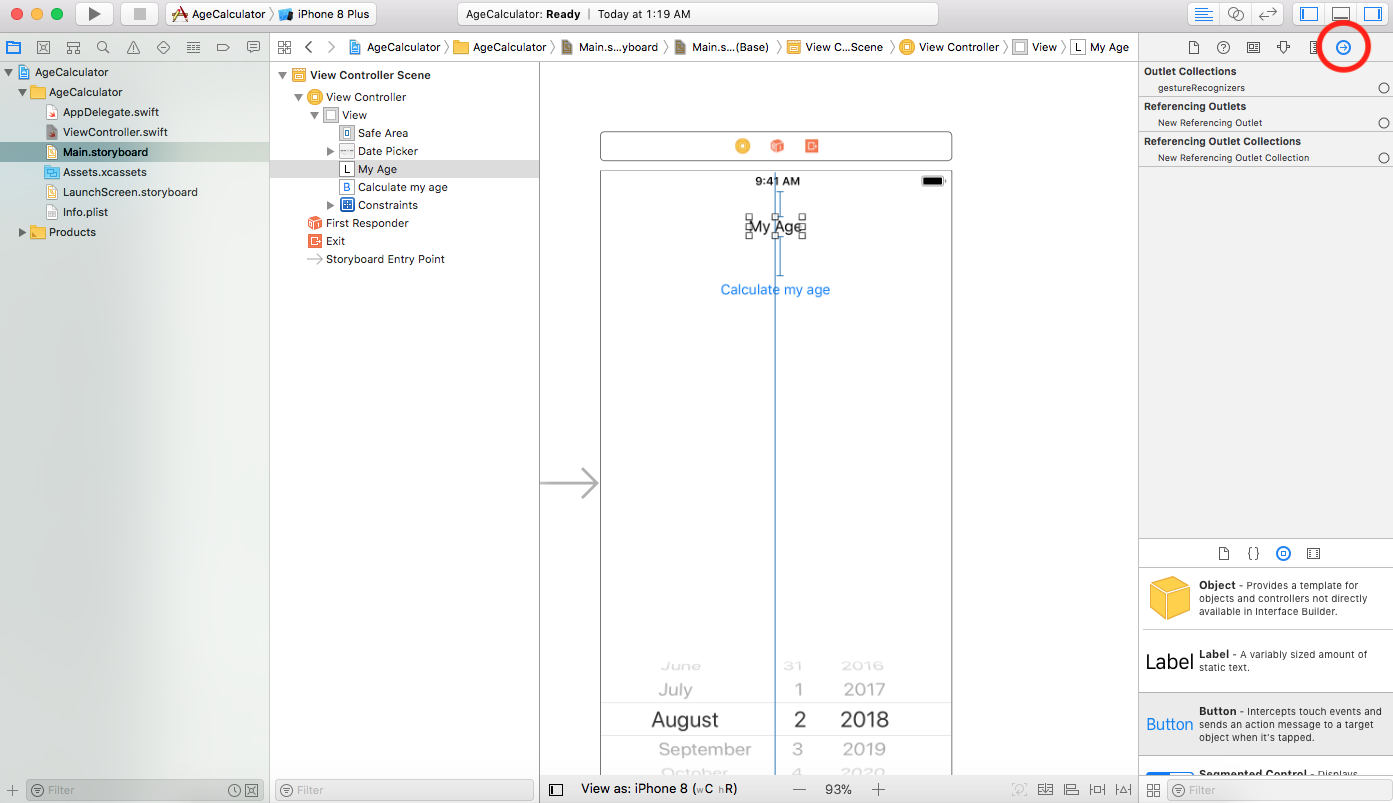
22- Drag from the circle next to “New Referencing Outlet” to “View Controller”
22- When you release your mouse a list of all IBOutlets with the same type of your object (UILabel in our case) will appear
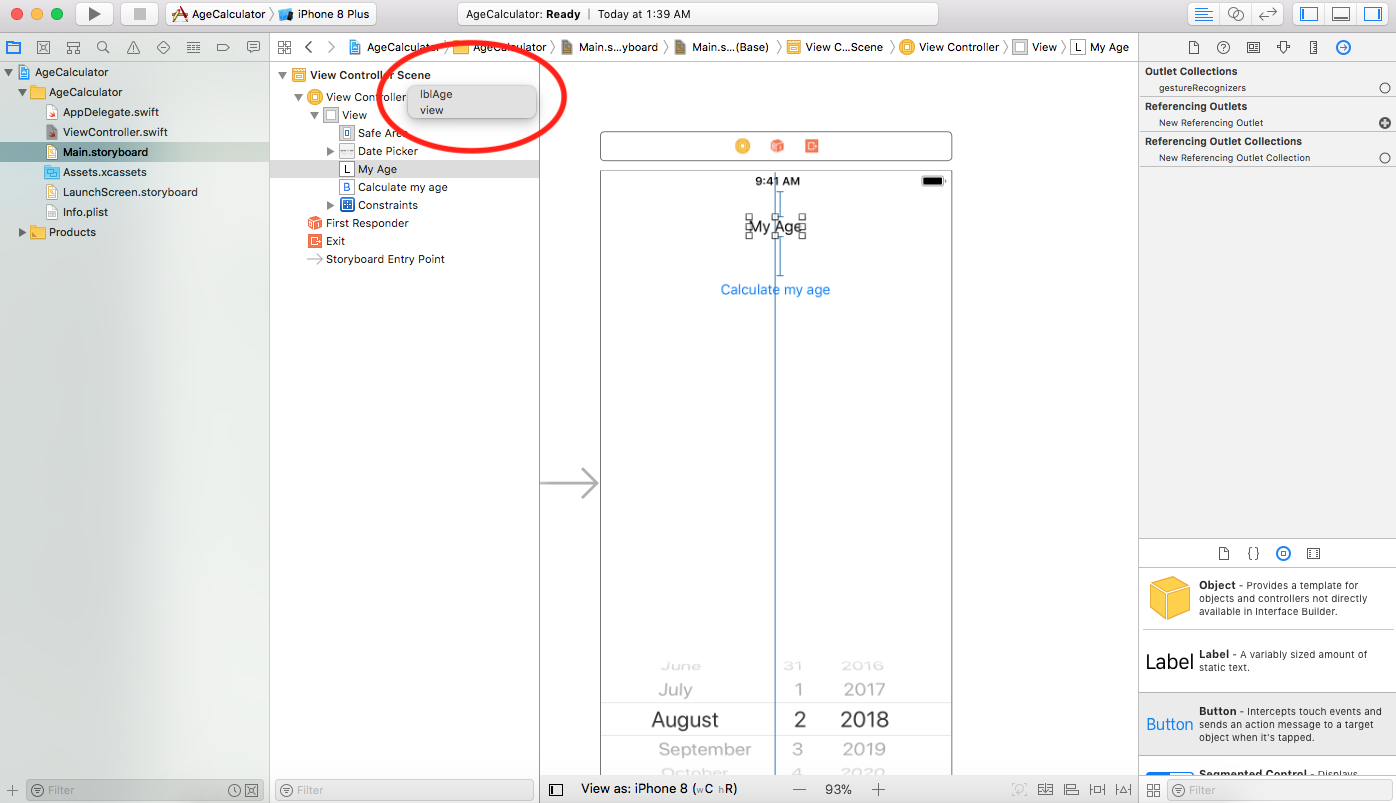
23- Select lblAge from the list, now you can access this label from the ViewController by using the lblAge property.
24- Repeat the same steps to connect the Date Picker with the datePicker property.
25- Linking an IBAction to our button is little difference, instead of dragging from “New Referencing Outlet” we will be dragging from an event.
Look at the “Sent Events” section and find the suitable event that may trigger our IBAction.
If you said “Touch Up Inside” you are right, this is the one that we always use for buttons
Lets drag from the circle next to it to the “View Controller”
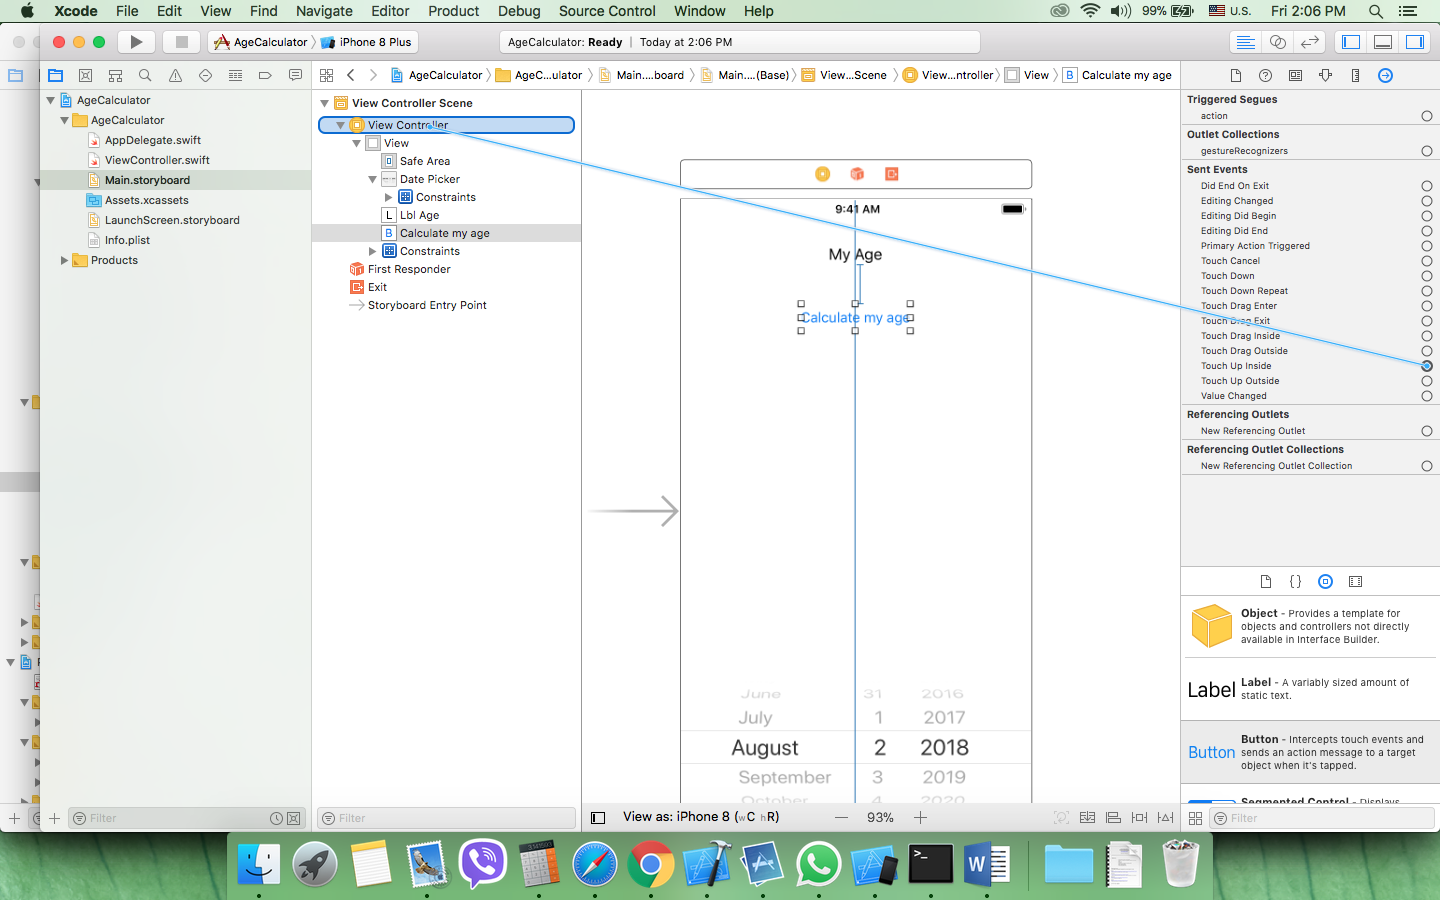
A list of IBActions with sender parameter of type “UIButton” will appear, in our case only one function is “btnCalculateHandler”, select it.
Using Calendar to get current age
26- Write the following code inside the “btnCalculateHandler (_ sender: UIButton)” function
        //1 - get selected date from date picker
        let birthDate = self.datePicker.date

        //2 - get today date
        let today = Date()

        //3 - create an instance of the user's current calendar
        let calendar = Calendar.current

        //4 - use calendar to get difference between two dates
        let components = calendar.dateComponents([.year, .month, .day], from: birthDate, to: today)

        let ageYears = components.year
        let ageMonths = components.month
        let ageDays = components.day

        //5 - display age in label
        self.lblAge.text = "\(ageYears!) years, \(ageMonths!) months, \(ageDays!) days"
First thing we did is getting the birth date selected by the user in data picker
Then we get the current date
We create a calendar instance of the user’s calendar – a calendar can represent date in more familiar way than date object, it can represent date in year, months or days.
Get difference in years, months and days between the birth date and current date by using our calendar object
We extracted the date components in separate objects for years, months and days.
Finally we set the text property of our label to display the result.
Now lets test our code by running on device or simulator
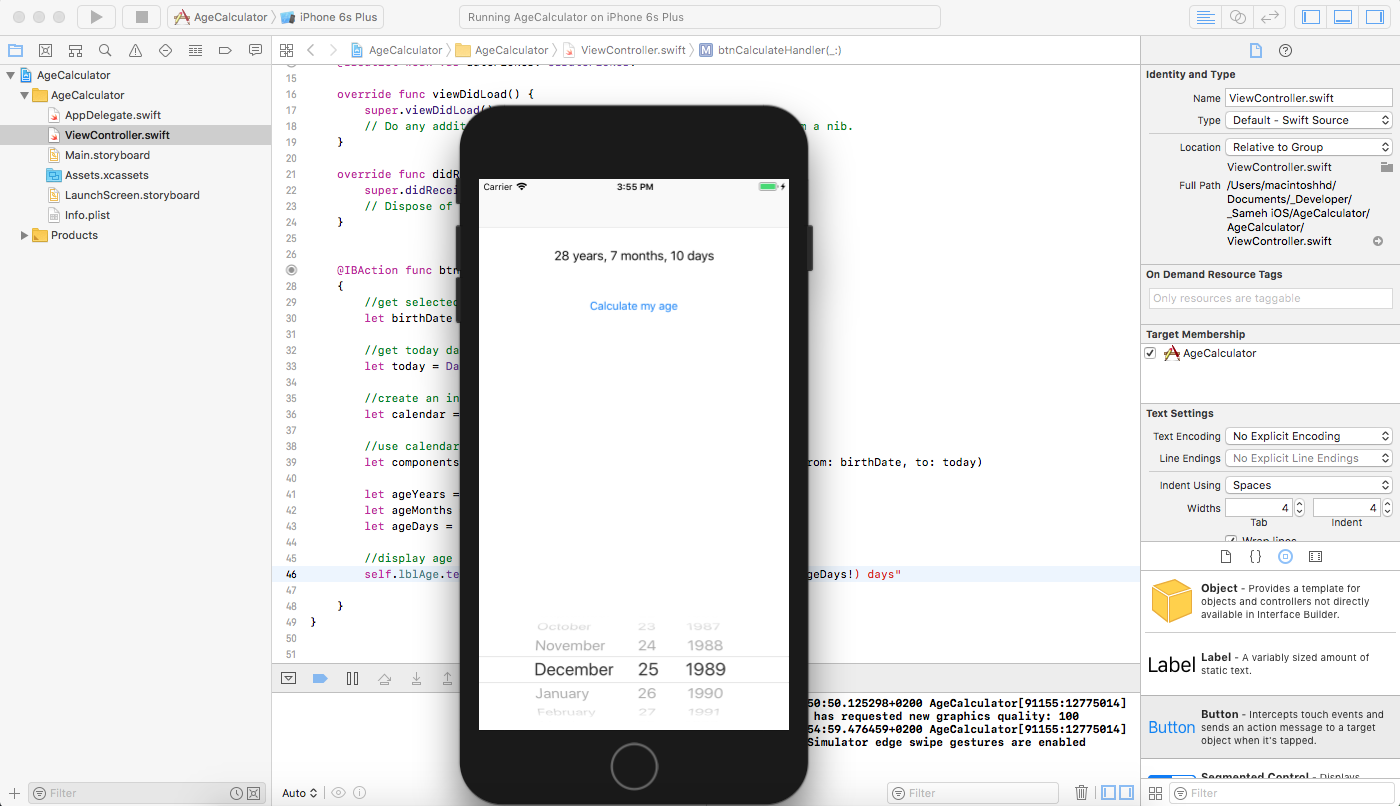
Everything should work fine except one thing
We does not validate user input before making our calculation.
To see what i mean try to select a date in future and press the calculate button, you will get an age in negative numbers, this is not acceptable

Your birth date cannot be in future, so we have to check that the selected date is in the past and if not we should display and error message to the user, lets do it
Using UIAlertController
27- Write the following code in the btnCalculateHandler function before the definition of the calendar object
        //check our birth date is earlier than today
        if birthDate >= today
        {
            //display error and return
            let alertView = UIAlertController(title: "Error", message: "Please enter a valid date", preferredStyle: .alert)

            let action = UIAlertAction(title: "OK", style: .default, handler: nil)

            alertView.addAction(action)

            self.present(alertView, animated: false, completion: nil)

            return
        }
Once we get the selected date from date picker and today current date we compare them using >=
If the selected date is equal to or greater than today’s date we display an alert box using UIAlertController.
First we create an instance of UIAlertController with title and message and preferred style (UIAlertController can be used to display actions sheets or alerts)
Then Create an action button with title “OK” and add it to our alert.
Finally we present it modally over application content using present(_:
We return from our function because we do not want to proceed with invalid date.
That reach the end of our tutorial , you can download the complete project here AgeCalculator