Custom controls using @IBDesignable and @IBInsepectable
You can design custom controls and render them in real time from Interface Builder using @IBDesignable and @IBInspectable attributes.
In the following example we will create a custom UIButton and change its corner radius, border color and border width from InterFace Builder with the help of @IBDesignable and @IBInspectable attributes.
Create custom UIButton class
1- Start by creating a new single view Xcode project and name it “DemoControl” and select Swift as the project language
2- create a UIButton subclass by selecting File -> New -> Cocoa Touch Class and press Next
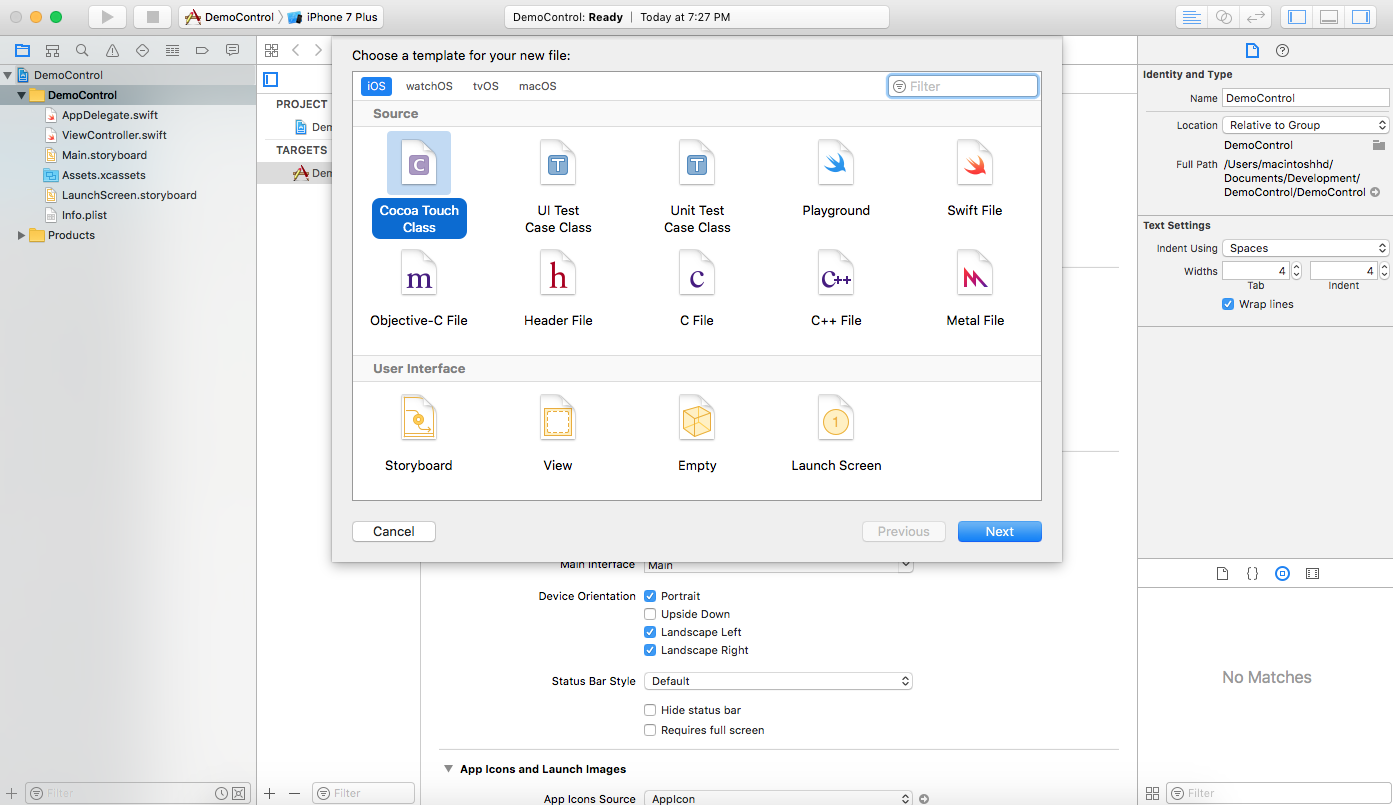
3- Type a name for the button, “DemoButton” for example and make it a subclass of “UIButton” then press Next
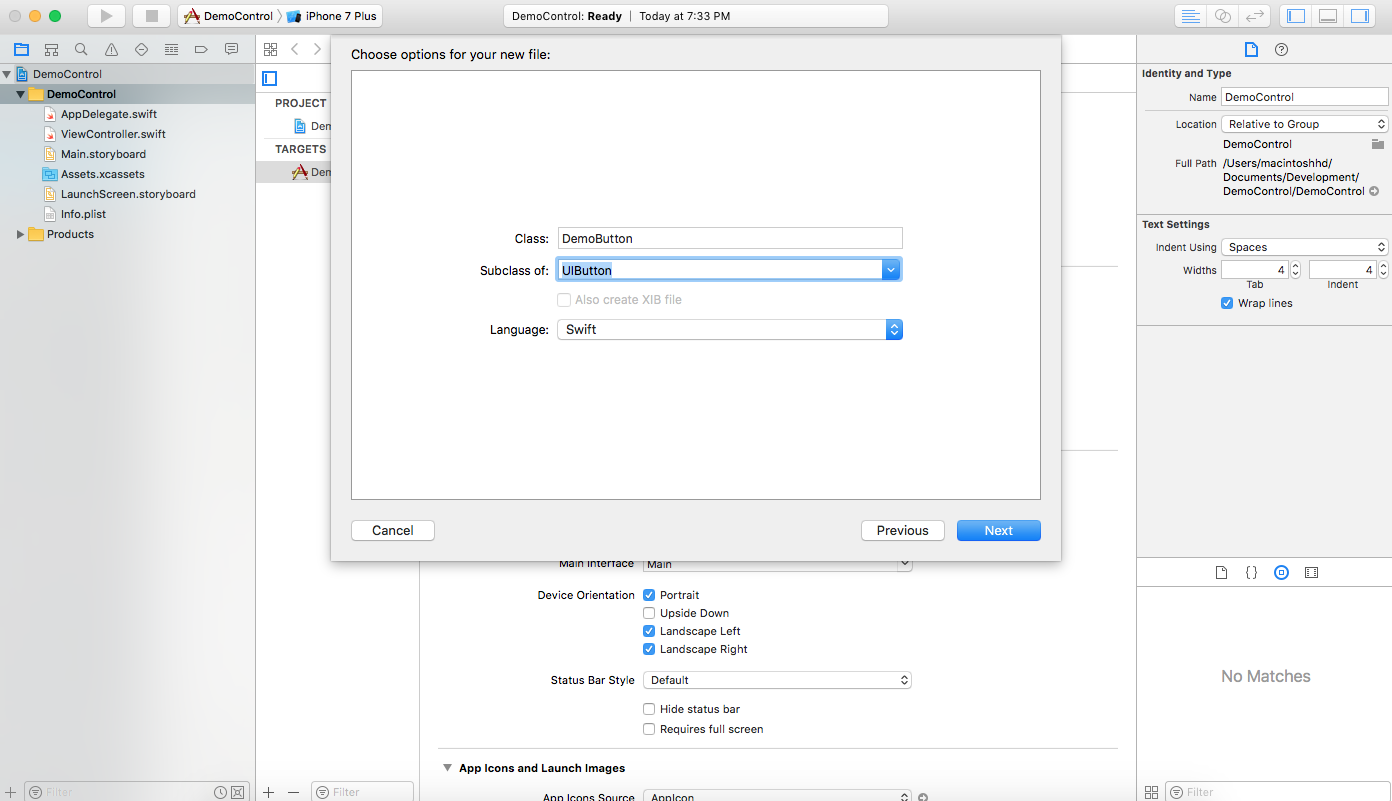
4- Select a location for your class or accept the default location and press Create
Add UIButton subclass initializers
5- Your button will be created either programmatically using init(frame:) or by adding it in storyboard using init?(coder:) so we need to implement both initializers. Add the following init functions to DemoButton.swift under the class declaration line
    override init(frame: CGRect) {
        super.init(frame: frame)
    }

    required init?(coder aDecoder: NSCoder) {
        super.init(coder: aDecoder)
    }
Customize UIButton subclass
6- Customize the button by adding corner radius, border width and border color to its underlying layer. Implement the following function inside the button class
func setupButton() {

        self.layer.cornerRadius = 10
        self.layer.borderWidth = 5
        self.layer.borderColor = UIColor.red.cgColor
}
7- Then call it from both of your initializers
override init(frame: CGRect) {
        super.init(frame: frame)
        setupButton()
}
required init?(coder aDecoder: NSCoder) {
        super.init(coder: aDecoder)
        setupButton()
}
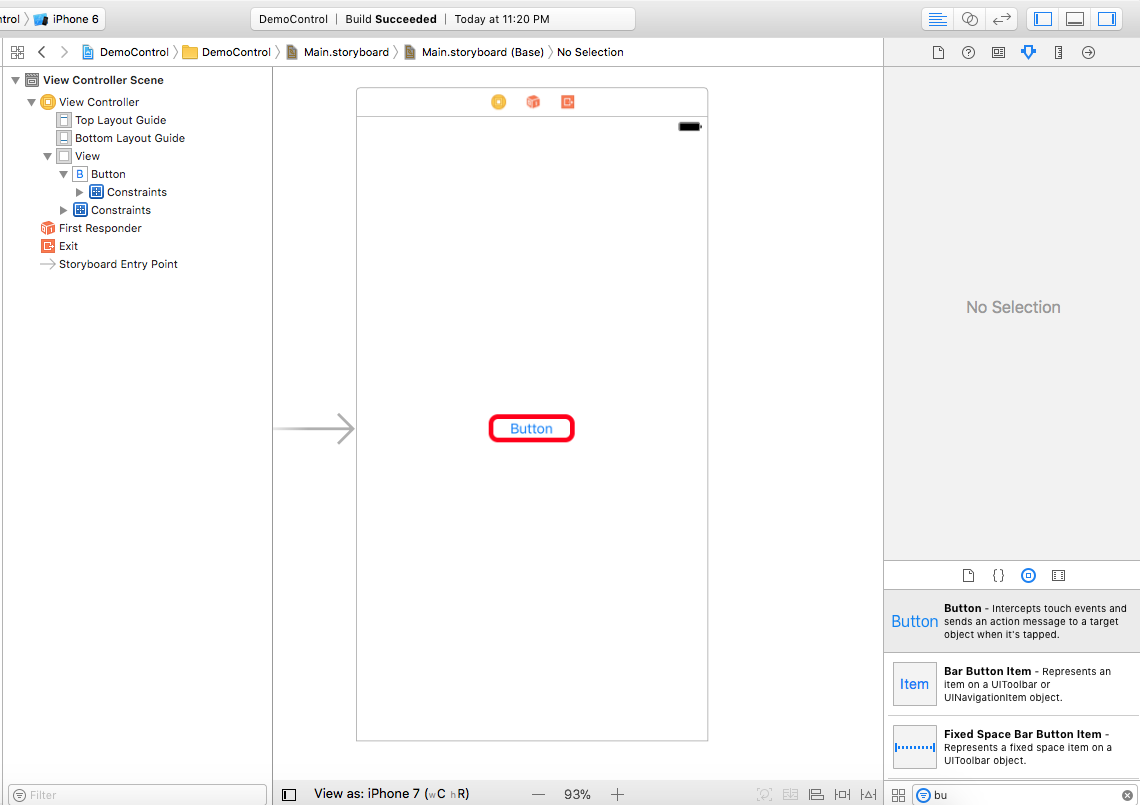
8- Open your View Controller in storyboard and drag a UIButton and add fixed width and height and Align vertically and horizontally constraints.
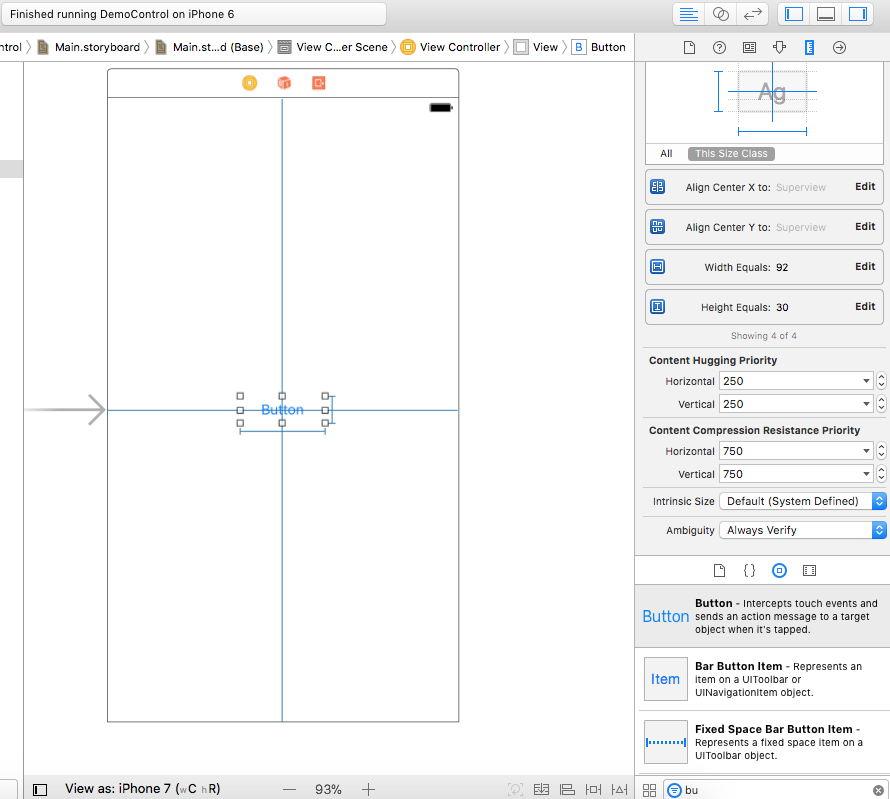
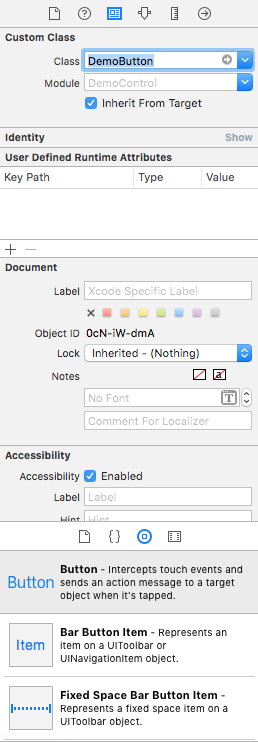
9- Open the button’s “Identity inspector” and change its “Class” property to “DemoButton” – your custom button.
10- If you run your application now you will find that your button had a rounded corners and a red border, but this is not what we want.
We do not want to wait until we build and run our app every time to see the button customizations, instead we want it to be rendered in Interface Builder in real time and also to be able to change its values from “Attributes inspector” and watch the changes in real time.
Using @IBDesignable
11- Just add the keyword @IBDesignable before class keyword in the class declaration line in DemoButton.swift
@IBDesignable class DemoButton: UIButton {
12- Go to storyboard and give it few moments to rebuild. The changes are rendered in Interface Builder.
Using @IBInspectable
Try changing border color in code and go back to storyboard, you will find that it was changed in storyboard too.
This is good but it will be better if you can change the values of these properties from within Interface Builder and this what we are going to do using @IBInspectable
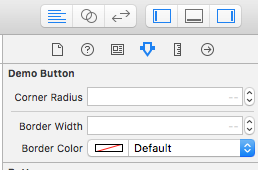
13- Declare these three variables inside class of DemoButton.swift
@IBInspectable var cornerRadius : CGFloat = 10
@IBInspectable var borderWidth : CGFloat = 5
@IBInspectable var borderColor : UIColor = UIColor.red
Adding the @IBInspectable attribute to your properties enables you to set their values from “Attributes inspector” in Interface Builder
14- Modify the setupButton() function so that it uses the value of those properties
func setupButton() {

        self.layer.cornerRadius = self.cornerRadius
        self.layer.borderWidth = self.borderWidth
        self.layer.borderColor = self.borderColor.cgColor
}
15-Go to storyboard and select your button. In “Attributes inspector” you will find the three properties but if you tried to change their values nothing happens.
16- Finally we need to add a property observer to each of our properties. Property observer is called every time a property value is set. Change the properties declarations as follows
    @IBInspectable var cornerRadius : CGFloat = 10 {
        didSet {
            self.setupButton()
        }
    }

    @IBInspectable var borderWidth : CGFloat = 5 {
        didSet {
            self.setupButton()
        }
    }

    @IBInspectable var borderColor : UIColor = UIColor.red {
        didSet {
            self.setupButton()
        }
    }
Now every time a property value is set even if it is set with the same value didSet will run and setupButton() will assign your new values to the underlying layer.
That was the last step. Go to attributes inspector and try changing your properties values. You should see your button changes to match the new settings.
Download the complete project DemoControl
You might like How to create custom UITableView header from xib file